How to Customize Notification Bar On Android (Without Root)
Using the same phone regularly might be boring for many of us. Everyone cannot afford a new phone everytime they get bored. So, why not to Customize Android Phone and get a completely new Phone? Today in this Article, I am going to Share How to Customize Notification Bar On Android (Without Root)?

Have you ever wanted to Change the Notification Bar of your Android Phone? If Yes, then you are at right place. Here, I’ll be sharing How you can completely Customize and Change Notification Bar On Android.
If you are looking to completely Change your Phones look, then there are many Customization Options available in Android. You can Change Android Fonts, Change Android Icons, Customize Phone Theme with Launchers, Use Emoji Apps, Change Clock Widgets, Download Wallpaper Apps, etc. and do a lot more things with Android Phones.
I’ve already shared many Android Customization Method and today I’ll be sharing How you can Customize Status Bar On Android Smartphones.
If you are using Android 6.0, then you can easily Customize Notification Bar using System UI Tuner, if not, don’t worry, thanks to the App named Material Status Bar that will help you in Changing Notification Bar On Android.
The best part about this is, you don’t need Root Access to Customize Android Notification Bar. So, without wasting more time, let’s proceed further and check out How to Customize Notification Bar On Android (Without Root).
Also Read : Temporary Mobile Number India For Bypass OTP Verification
Contents
How to Customize Notification Bar On Android (Without Root)
How to Customize Status Bar On Android Using Material Status Bar App?
If you are bored with your current Notification Bar Design, then you can Download Material Status Bar App & Customize your Notification Bar.
There are few steps to follow to Apply the Custome Notification Bar. Below is the Step by Step Guide to Setup, Activate and Customize Android Notification Bar.
1. Download Material Status Bar App
The first step is to Download Material Status Bar App on your Android Phones. You can download it directly from the link below or manually from the Google Play Store.
- Download Material Status Bar App from here or follow the steps below: Download
- Open Google Play Store & Search for Material Status Bar.
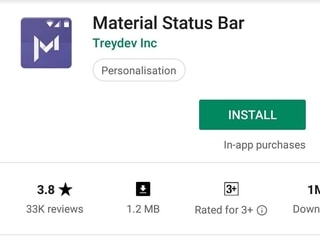
- Now, Click On Install to Download the App shown in the above image.
- Finally, After installation, Open the App.
2. Setup Material Status Bar App On Android
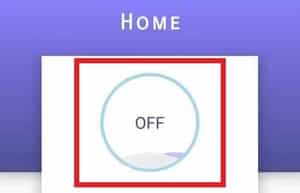
- Open the App & Click On Off Button.
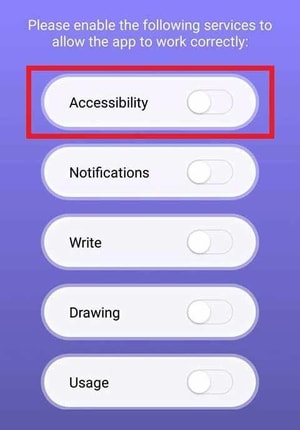
- On the next screen, you’ll see the list of services the app requires the access for. Click on the first option, Accessibility.
- Now, scroll down to the “Services” section and tap on Material Status Bar App.
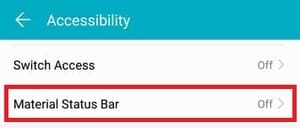
- On the next screen, Turn On the Permission and you’ll get a Pop-up. Simply Click On Enable or OK.
- Now go back to the App and click on another option which is Notifications.
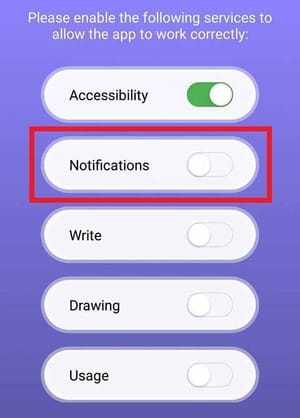
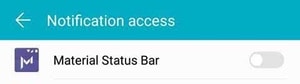
- Click On Turn On Button and Enable Material Status Bar App from the Notification Access Center.
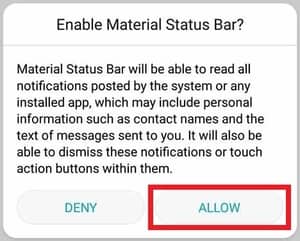
- Now, you will get a Pop-Up, Simply Click On Allow Button.
- Again go back to the App and do the same for the other permissions. You have to give the App permission for Accessibility, Notifications, Write, Drawing and Usage.
- After giving all the permissions, go back to the main screen of the App.
3. Customize Android Status Bar
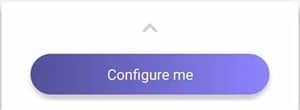
- Open the App & Make sure you have given all the above permissions.
- From the Home Screen, Click on Configure me.
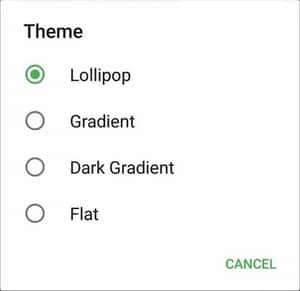
- Now, Click On Theme & Select the Theme you like.
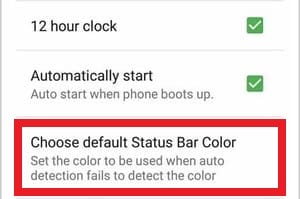
- Scroll down & Customize the Status Bar according to your needs. You can Enable or Disable Battery Percentage, 12 Hour Clock, etc.
- Now Click On Choose default Status Bar Color to Change Notification Panel Color.
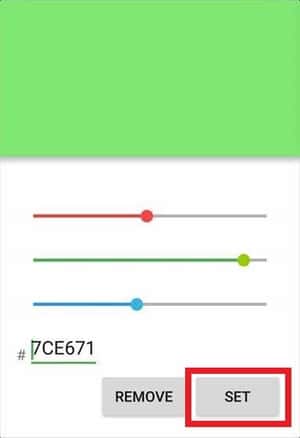
- Here, Select the color whichever you like and Click on Set Button.
4. Customize Individual Apps
- Open the Material Status Bar App.
- On the main screen, Click on App List.
- From the list of Apps Installed on your Phone, Select the App you want to customize.
- Now, from the dropdown, Click on the Color Box.

- Choose the Color you like and then Click on Set Button.
These were the few customization options available on the Material Status Bar App. Apart from this, Material Status Bar Pro is also available where you can customize more and Change Notification Bar according to your needs.
Also Read : How to Create Gmail Account Without Phone Number (5 Methods)
How to Change Notification Bar Color & Design?
Another cool way to customize notification bar is Changing Notification Status Bar Color and Design. You don’t need to do any coding for that as there are many different Status Bar Changer App available on Google Play Store.
With this Status Bar Changer App, you can Change Status Bar Color, Design, Style and much more. This looks awesome in the Notch Phones. So, let’s begin with How to Change Notification Status Bar Color.
1. Download Status Bar Color Changer App
- Download Status Bar Changer App From Here: Download
- After download, Open the App.
2. Setup Notification Bar Color Changer App
- Open the App.
- It will ask for “Draw Over Other Apps” Permission.
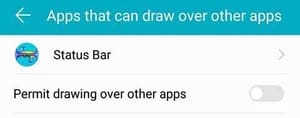
- Simply, Give the Permission and Click the back button.
- On the App, Read the Instructions, then scroll down and Click On I Get It, Don’t Show Me This Again.
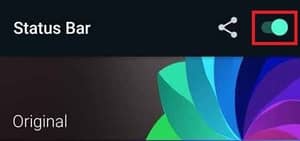
- On the main screen, Enable the App by clicking on Top Right Corner.
3. Customize Notification Bar Design & Color
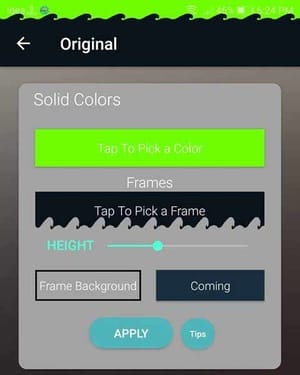
- Open the App & Once the setup is complete, Start the Notification Customization.
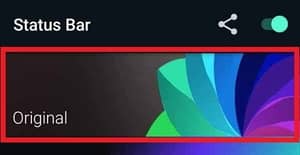
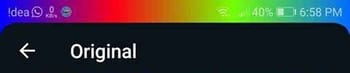
- On the main screen, Click On Original.
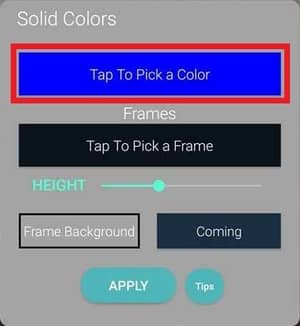
- In the “Solid Colors” Section, Click On Tap To Pick a Color.
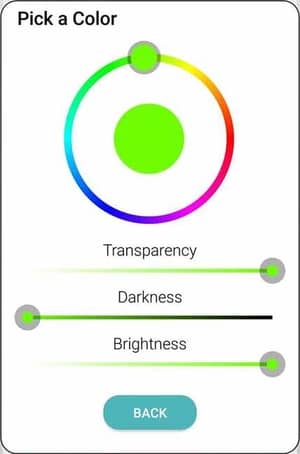
- Here, Select the Color and adjust the Transparency, Darkness & Brightness. Once done, Click on Back Buton.
- In the “Solid Colors” Section, Click On Tap To Pick a Frame.
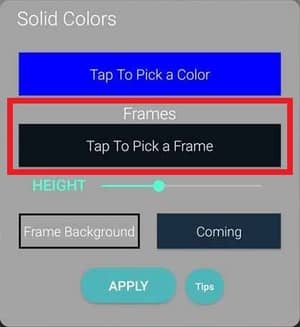
- From the list of Frames, select the one you like and Click On Done.
- Finally, Click On Apply Button.
Done! Notification Panel Color & Frame is changed successfully.
If you don’t like this Frame & Color Combination, don’t worry, there are tons of Customizations for you. Head over to Styles and Presets Section for more colorful combinations.
- In the Original, Go to “Styles and Presets” Section.
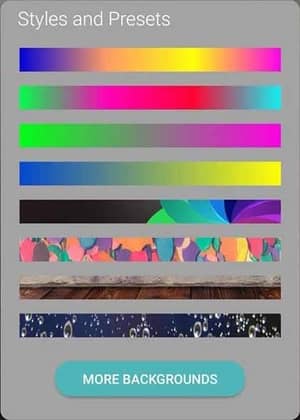
- Here, you can directly tap on any of the Color Combinations or simply click on More Backgrounds Button.
- From the lists of Backgrounds, Choose the one you like.
- Finally, Click on Done.
The Selected Background will be applied to your Notification Bar. The Background looks really awesome after using it as you can see in below image.

Also Read : How to Make Undeletable Folder In Windows 10
Apart from this, the App also has one more Customization Option where you can Set 4 Different Color Combination to your Notification Panel. Below is the Step by Step Method to Apply it.
- In the Original, Go to “Gradient Colors” Section.
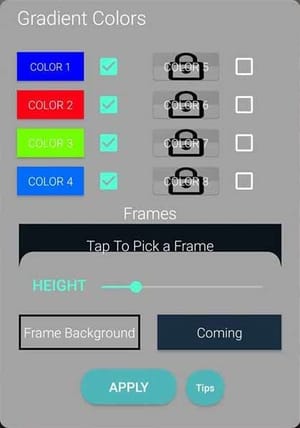
- You can see 4 Color Options to select. Click on each of them one by one and select your 4 favorite color.
- Now, Select the Frame & adjust the Height.
- Finally, Click on Apply Button.
Done! Your new Status Bar has been updated with the beautiful color combination. You can Change or Remove the Theme and Color anytime you want.
How to Customize Notification Bar On Android 6.0 Phones?
If you are running Android 6.0 or above, then you can Change Status Bar Icon Color, Theme and Style without using any Android App.
To Set Custom Status Bar On Android, you can follow the below steps.
- Firstly, Open Notification Panel by sliding from the top of the screen.
- Now, Press & Hold the Gear Shaped Setting Icon for 5 to 10 seconds.
- You will get a message saying “System UI Tuner has been added to settings“.
- Now, Go to your Phones Setting and scroll to the bottom of the page. You’ll find a new setting, named System UI Tuner.
- Click On System UI Tuner and you can find following settings to customize your notification screen.Quick Settings: Quick Settings allows you to remove and rearrange Notification Icons present in the Quick Settings Menu.
Battery Percentage: Using this feature, you can Embed Battery Percentage in the status bar.
Arrange Icons: With this Setting, you can arrange any Notification Icon according to your needs and requirements.
Also Read : How to Take 360 Degree Photos (Android & iOS)
Final Words
This was the Article On How to Customize Notification Bar On Android (Without Root). Apart from this, there are many other methods as well but here I’ve shared the Top 3 Best Methods to Change Status Bar Notification Panel. Also, there are many other App that can help you in Changing the Notification Panel.
Hope you liked this Article On Customize Notification Bar. Do Comment below if you have any query. Stay tuned with us for more latest Tricks & Updates.

How to Take 360 Degree Photos (Android & iOS)

How to Direct Message On Instagram PC (2 Methods)

How To Stop Auto Download In WhatsApp
About Author
Dheeraj Singh
Dheeraj Singh is the Founder & CEO of Trick Xpert, a Part-Time Blogger. He is here to provide information about Latest Technology, Tricks, Money Making Tricks & Blogging Tips.