How To Make Bootable USB Pendrive For Windows 7/8 [Full Guide]
Hey Readers, hope you are enjoying our tricks and offers. So here we are back with how to make bootable USB Pendrive for windows 7/8. It’s very simple to make bootable USB pendrive for windows 7/8. Generally we install windows by using CD/ DVD. But CD/ DVD doesn’t work many times & it get corrupted after using it for 2-3 times.
So, in this tutorial I’m going to show you have to make a bootable USB pendrive for windows. You can insert windows file in the pendrive and you can format your pc and install windows 7/8 on your pc. To install windows on your pc by using pendrive first of all you need to boot your pendrive.
So, lets proceed further and check out how to make bootable USB Pendrive for Windows.
Steps To Follow:
- Firstly Connect USB device to your computer [Atleast 4GB].
- Now Open CMD as “Run as administrator”.

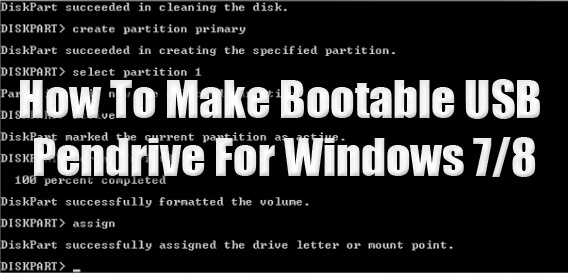
- Type the following commands in CMD.- diskpart (Press Enter)
– list disk (Press Enter) [It will list all the disks related to your computer including pendrive that you connected.] - After “list disk” command you can see it will show two disk.

– 1st Disk 0 – 465 GB
– 2nd Disk 1 – 3825 MB
[The size of 2nd (Disk 1) is near about “3825 MB” which is around 4GB. So, that the pendrive.] - Type following command after list disk command.- select disk 1 (Press Enter)
– clean (Press Enter)
– create partition primary (Press Enter)
– select partition 1 (Press Enter)
– active (Press Enter)
– format fs=ntfs quick (Press Enter) - Formatting will take around 2-3 minutes to complete.
- Type “assign” command. As soon as you type assign command you will notice that your USB drive name is changed.
- After “assign” command type “exit” to exit from diskpart.
- Now Obtain windows file from somewhere and save them to a folder in your PC. [I Copied all the content in E Drive.]
- Make sure that, there must be “boot” folder in your windows 7/8 folder and there must be “bootsect” executable files present in boot folder.
- Now type the below command in CMD.- E: (Press Enter) [ I have saved my windows file in E drive so I have selected drive E]
– cd Win7U (Press Enter) [After cd type your windows file name as my file name is “Win7U”]
– cd boot (Press Enter)
– bootsect.exe/nt60 J: (Press Enter)[I typed J because J is the drive name of my USB device]
– exit (Press Enter) - Now you just need to copy the whole content of windows folder to your USB Drive.
- Done! Now your USB Pendrive is now bootable.
- You can use it not to format and install windows on your computer.
Video Guide On How To Make Bootable USB Pendrive For Windows 7/8

5 Best Photo Editing Apps For Android Phone
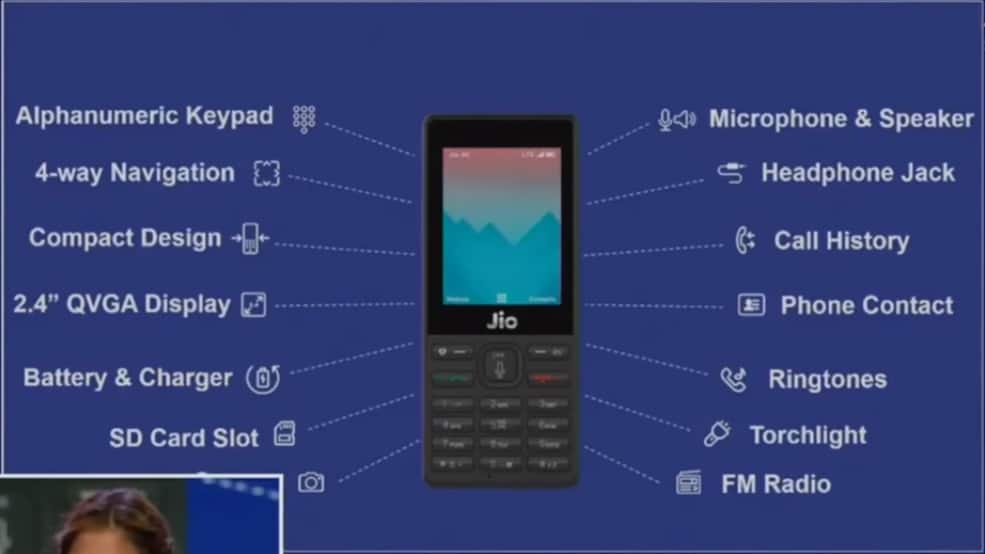
Reliance Jio 4G Feature Phone: Features, Price In India, Specifications, How To Buy

Windows 7 Launcher For Android | Android Window 7 APK
About Author
Dheeraj Singh
Dheeraj Singh is the Founder & CEO of Trick Xpert, a Part-Time Blogger. He is here to provide information about Latest Technology, Tricks, Money Making Tricks & Blogging Tips.